nerc-ceh.github.io
https://nerc-ceh.github.io/version_control/exercise3
Exercise 3. Team working
In the previous exercises you have been the only person working on your Github hosted repository. This may be sufficient for your needs. However, you may be part of a team where you all need to edit the same code base in a managed way. In this exercise each team member will work on a clone of the same Github repository and share their changes to the others via Github using Pull and Push actions.
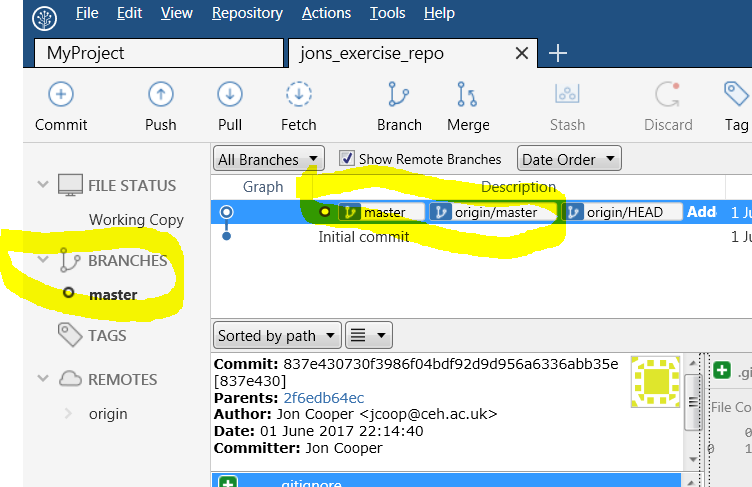
To do this effectively you will also learn about Branching and Merging. So far, all your commits have been to the default branch - this branch is called master. You may have already noticed master in SourceTree as highlighted here (under the Log/History tab):
However, it is common to create new branches for specific pieces of work. This isolates your changes from the master branch, and any other branch that may have been created. It is only when you are ready that these changes are merged from your new branch into the master branch (or potentially any branch) via a Pull Request. This is very useful in busy projects with multiple editors and lots going on. There is more than one way to create a branch, in this exercise you will do it via Github.
Overall you will learn about:
- Creating a branch
- Pulling down changes from your team
- Resolving conflicts
- Creating and accepting pull requests to merge a branch back into the master branch
Prerequisites: On-line
To participate in this exercise you need to be on-line. There should at least be wifi available during the workshop, so please use that.
Step 1. Form a team
- Team up with at least one other person. You will work together to see how your changes affect each other.
Step 2. Collaborate on one of your Github repositories
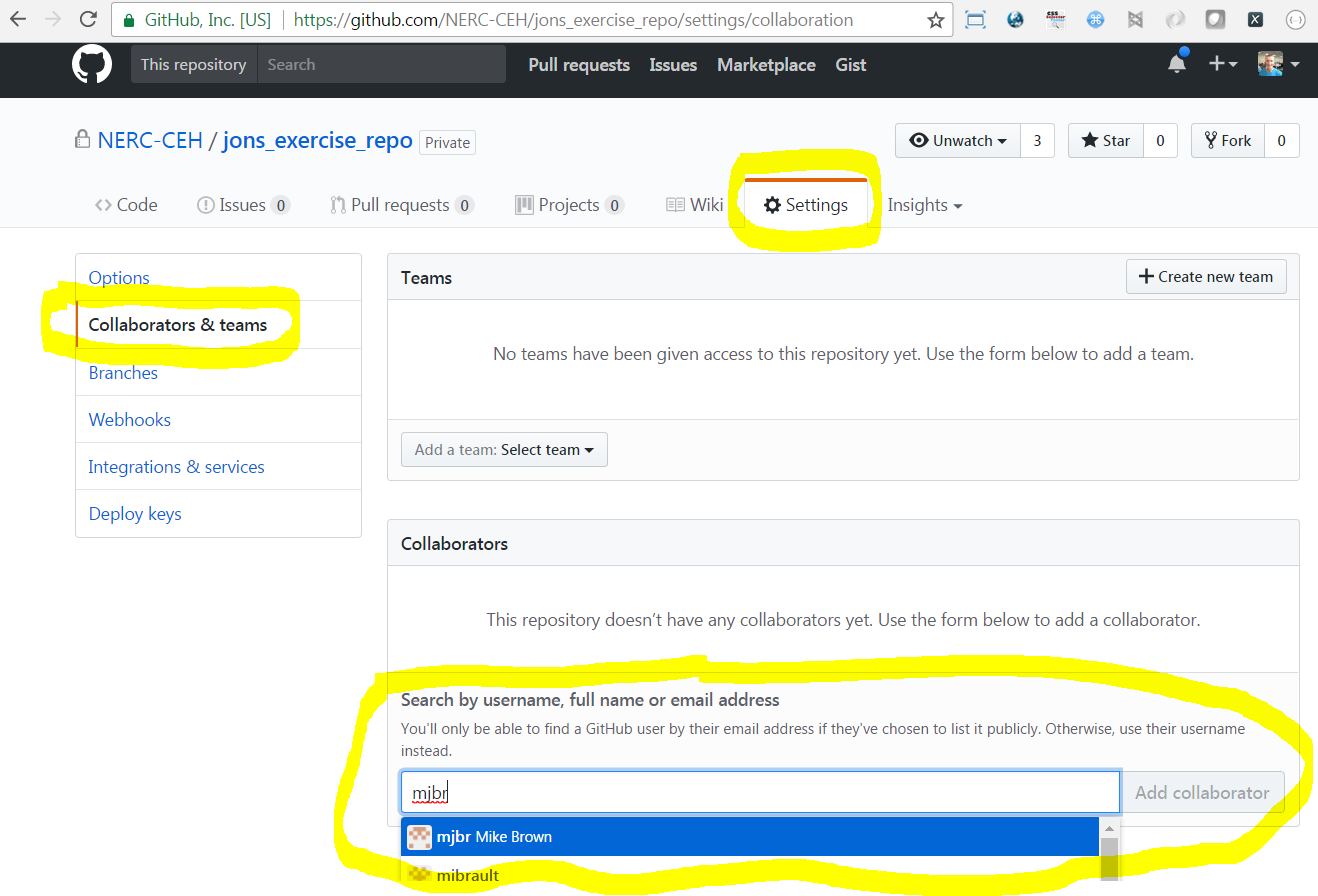
- Choose whose repository from Exercise 2 you are all going to work with. The owner of this repository must add their team mates as collaborators in Github so they can all work on it. The owner should go to the repository on Github, select the Settings tab near the top, then Collaborators & teams and then add their team mates using the search box in the Collaborators panel. They will receive an e-mail invitation that they should accept. If that sounded tricky, this help page on Github may be clearer. This is what the add collaborators page looks like:
Step 3. Collaborators clone repository
Everyone needs a local clone of the repository. The owner should already have one. However, the collaborators (ie other team members) must clone it from Github. Follow the instructions from Exercise 2 Step 3 and use the URL of the repository you are collaborating on.
- Everyone in your team should now have a local clone of the same repository ready to make edits to and to manage in SourceTree.
Step 4. Create a new branch via Github
The team needs to do some urgent work documenting Giraffes! One person should now create a new Giraffes branch in Github ready for the whole team to checkout and work on.
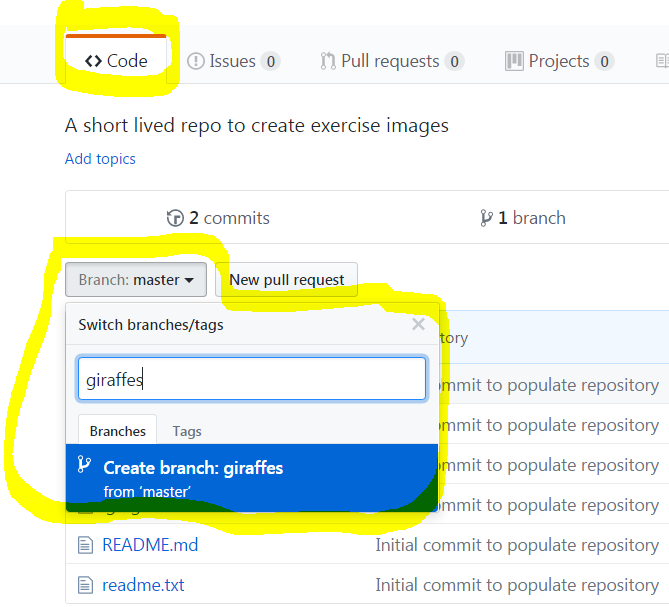
- one person in the team go to the repository in Github, and on the Code tab, find the Branch drop down, select it, type giraffes in the box and press return:
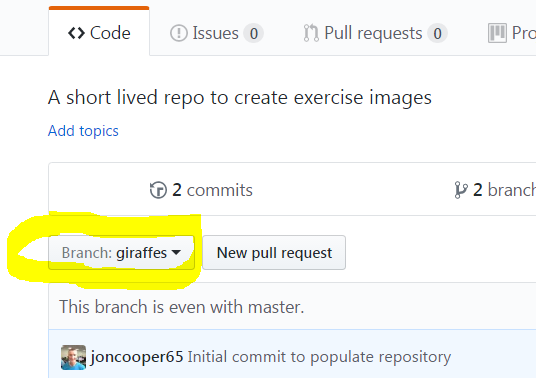
- you will now see the new branch available in Github:
Step 5. Fetch and checkout the new branch
Everyone now needs the giraffe branch in their local repository so they can work on the files. This is a two stage process.
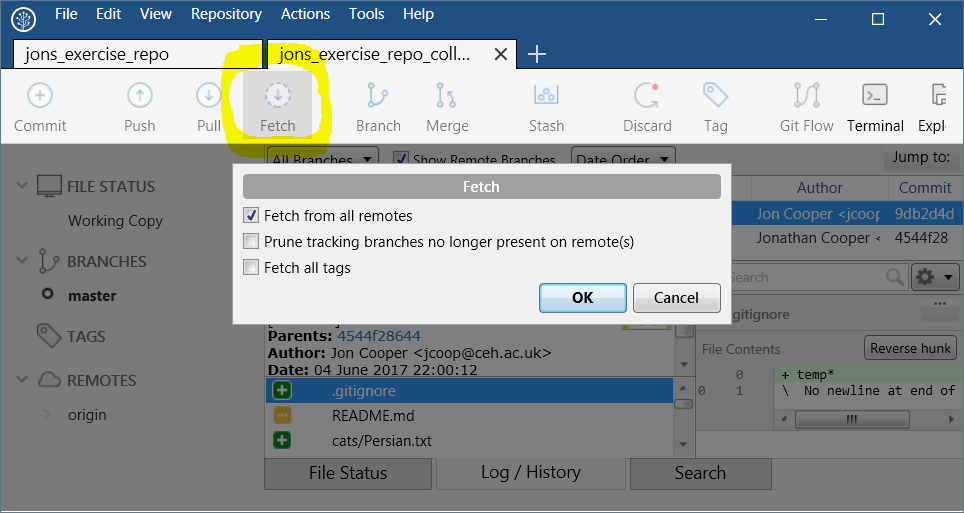
- Firstly, with your repository open in SourceTree, press the Fetch button and in the dialogue just tick Fetch from all remotes:
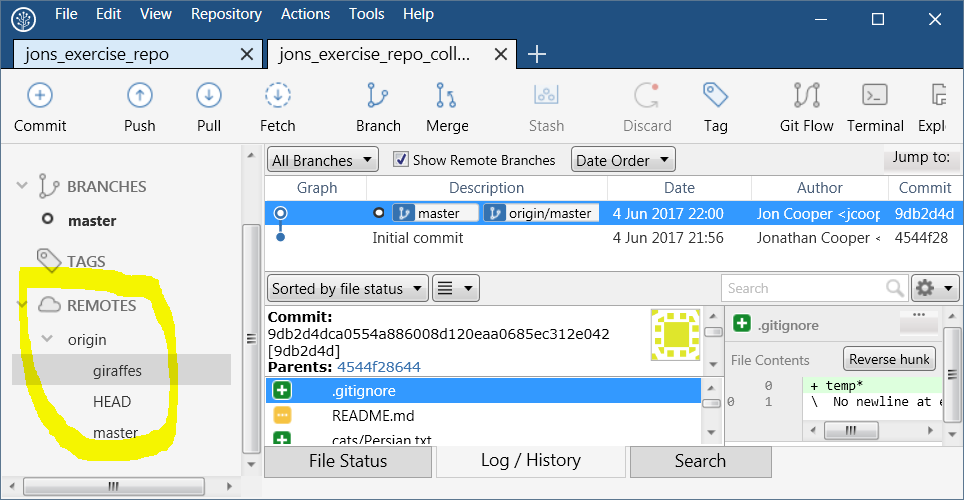
- This has fetched information about your new branch, which you can find under the Remotes > origin drop down on the left, notice the giraffes branch has appeared:
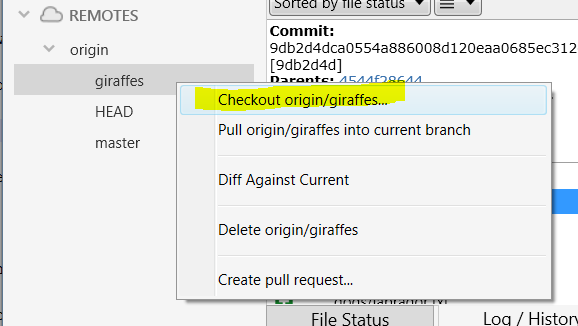
- Secondly, checkout the giraffes branch by right clicking on it and selecting Checkout origin/giraffes…
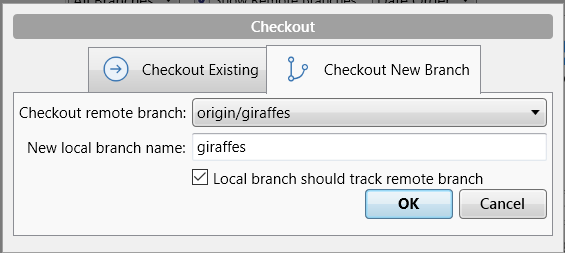
- In the Checkout dialogue that appears, select the Checkout New Branch and keep the defaults as shown below:
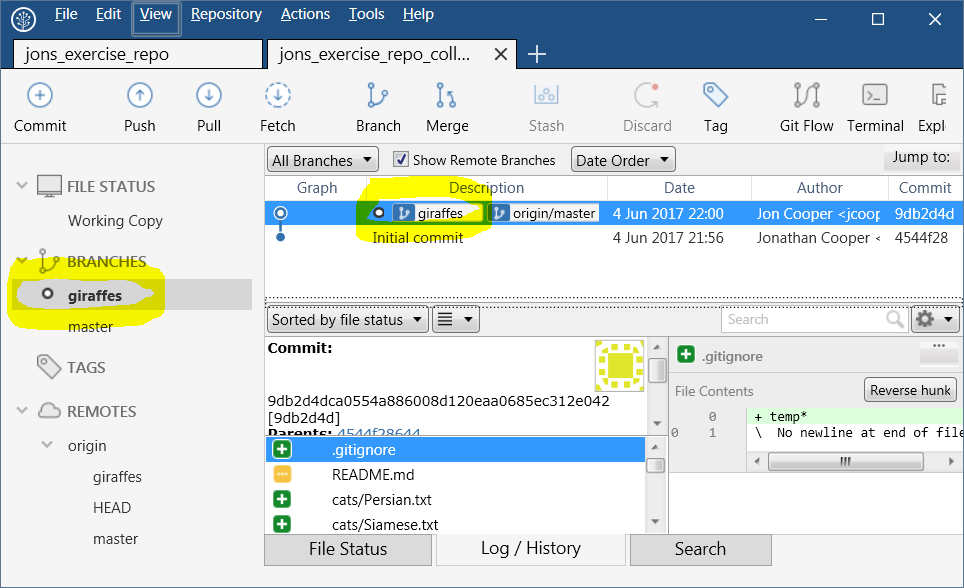
- You will all now have the giraffe branch in your local repository checked out ready to use, like this:
Step 6. Pushing and pulling changes
Time to start working as a team. You will now add some content to the giraffes branch you all have checked out. Two people will work on separate parts and push them up to Github.
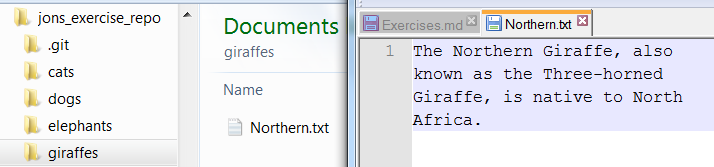
- Person 1: In Windows Explorer create a folder at the root of your project called giraffes, within that folder create a new text file called Northern.txt that contains some text about the Northern Giraffe.
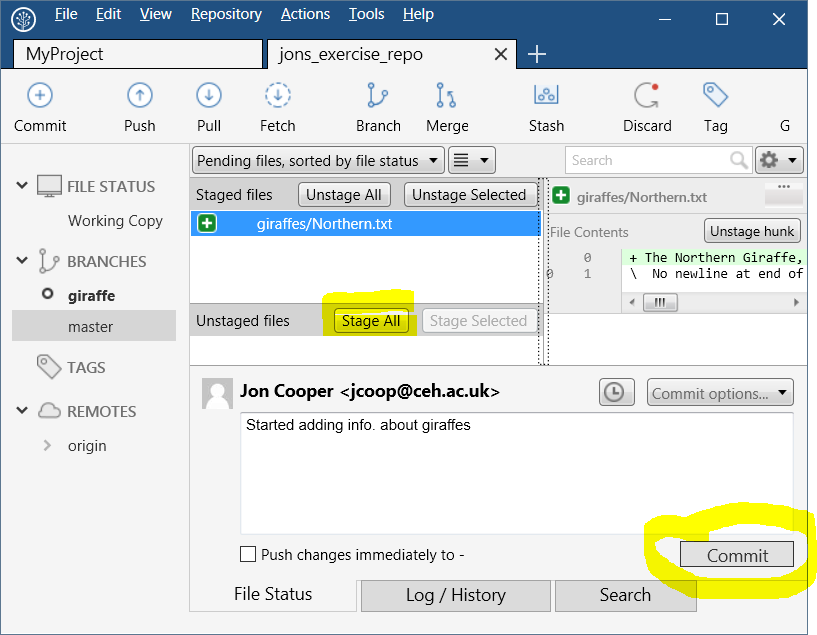
- Person 1: In SourceTree, stage and commit your edits with a brief message:
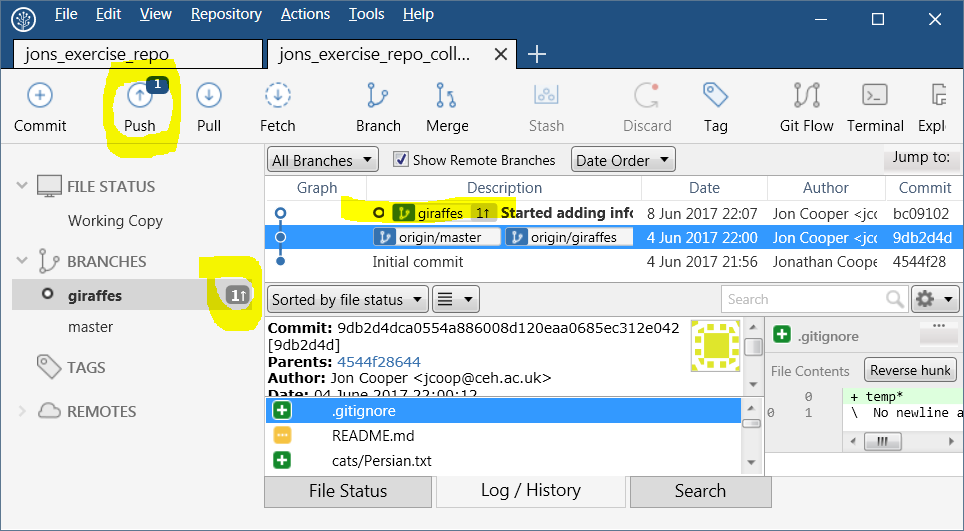
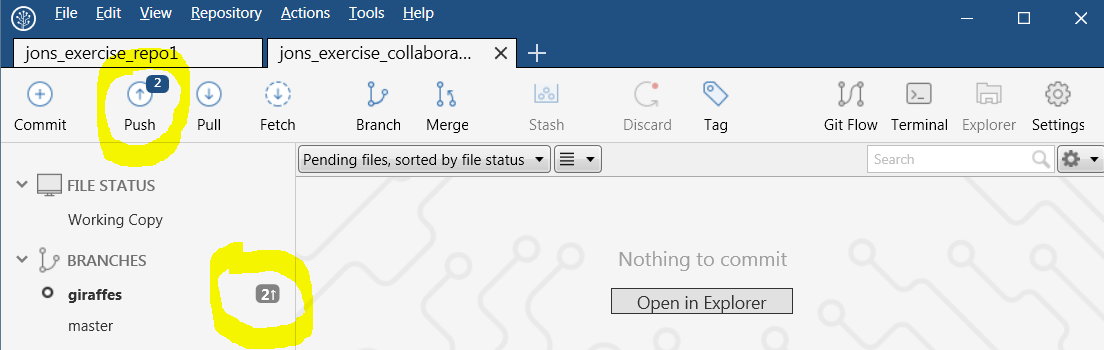
- Person 1: In your Log/History view you will see the Giraffe branch ahead of the Master branch, since it has changes that Master does not. You will also see that a number 1 has appeared in several places indicating that there is a new commit that has not been pushed up to Github:
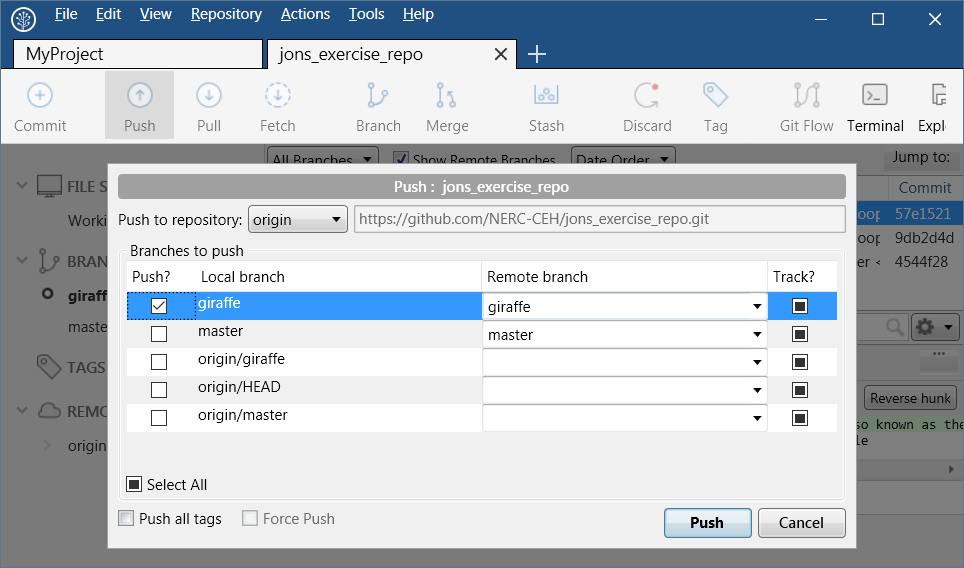
- Person 1: Now Push your changes to Github as you have done before, pressing the Push button. This time you will be asked which branches to push, since you have only worked on Giraffe, then just tick that one as shown below.
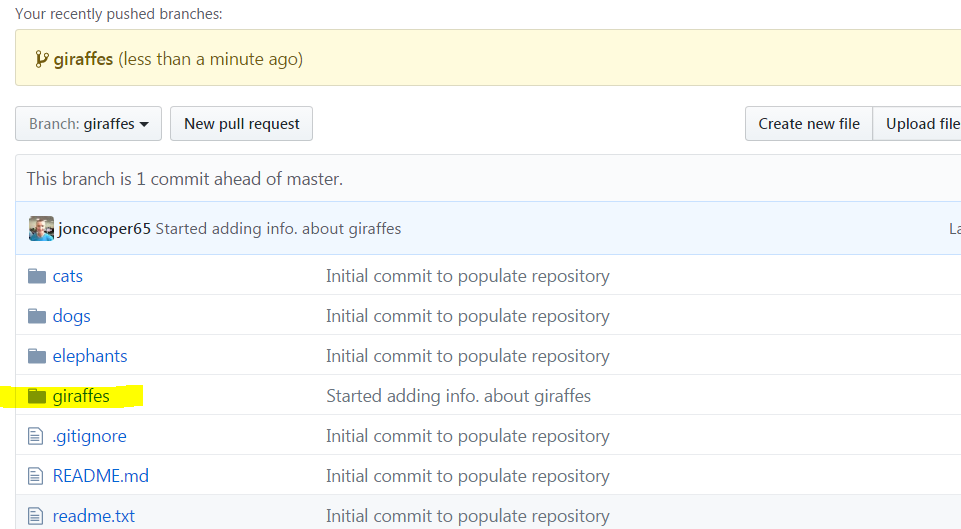
- All team members can review the changes on Github in the browser if they want. Under the Code tab you will see your new giraffe folder amongst the others.
- Person 2: it is your turn to do some work. Firstly pull down your colleagues giraffe work, use the defaults in the Pull dialogue that appears:
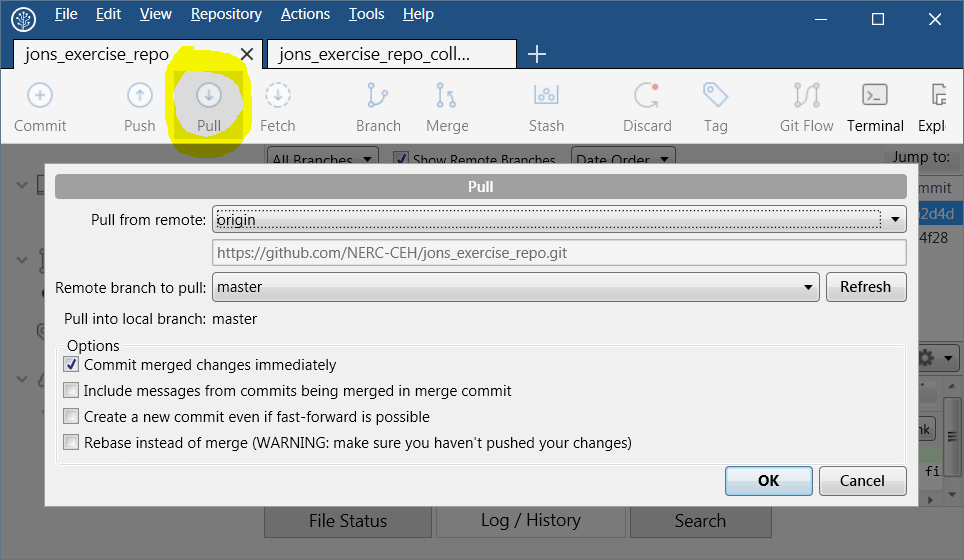
-
Person 2: You should now see the new giraffes folder containing Northern.txt, if you do not, make sure you have checked out the giraffes branch and aren’t on the master branch. Simply add a new line of text to giraffes/Northern.txt - eg ‘They can run at 55 km/h’. Stage and commit your edit, and then push up to Github.
-
You should now have the idea that you and your colleague(s) can Push to share changes and Pull to receive them and therefore all keep in synch with each other. This way you all contribute to the branch of the repository until the work is done. But, what happens if two people independently edit the very same piece of text? That is the next step.
Step 7. Conflict resolution
In this step you will learn how to solve the conflicts that arise when two people independently edit the same part of a file with different text. You will create the conflict by both editing the same text, once one of you pushes your change to Github the other will see conflict errors when they try to push their change. You will decide what the correct text should be and push the resolution to Github. So start by creating the conflict…
- Two team members should agree to edit the same line of the same file (eg giraffes/Northern.txt), but add slightly different text.
- Person 1: stage, commit and push your changes to Github.
- Person 2: after person 1 has pushed their change, do a stage and commit, but this time do a pull before you push so that you pull down their edit. You will get the following warning triangles in SourceTree that say Conflicted when you hover over them. If you select your problem file the conflicting text is shown in the panel on the right in green with additional text inserted that tries to show you what is going on.
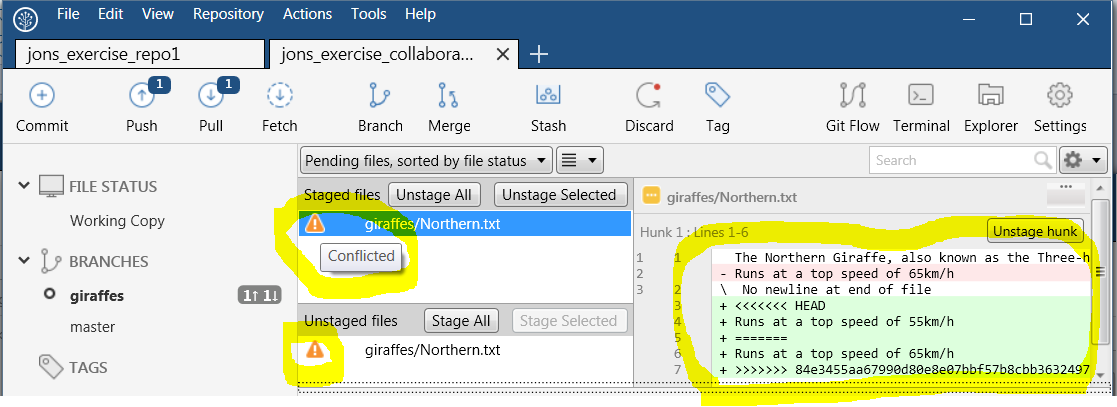
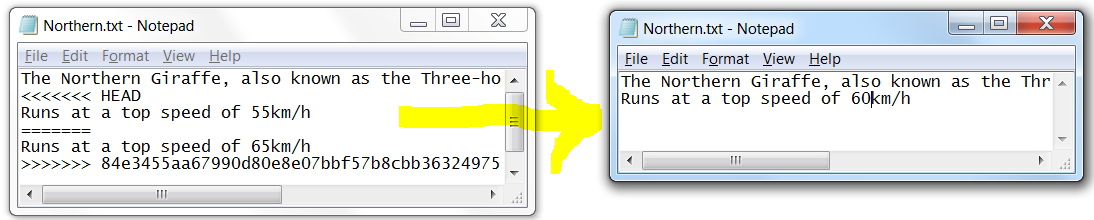
- So what is going on and how do you fix it? As you can see in the example, different text about the speed that giraffes run at has been added. The conflicting text is now bordered by chevrons («< »>). Discuss and agree what the correct text should be! Then, Person 2 open the file that contains the conflict in an editor and simply replace everything shown as a conflict with the correct text - including the chevrons, equals signs and the big long number, here is how it looks before and after:
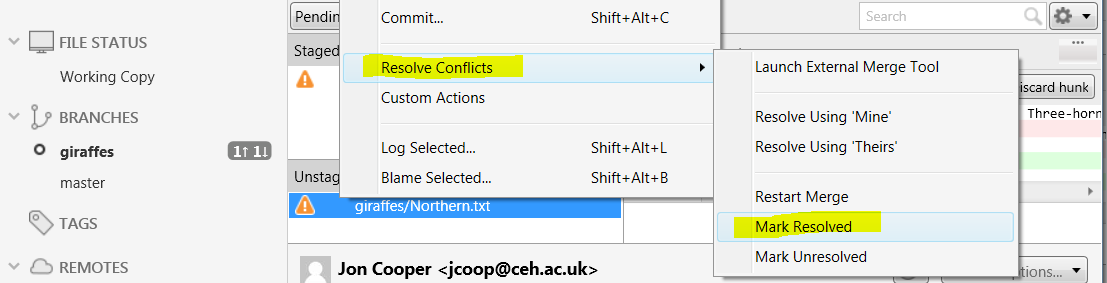
- Back in SourceTree, you will still have the conflict warning triangles next to the file. You need to let SourceTree know that you have resolved the conflict, which you do by right clicking the file name and in the context menu select Resolve conflicts > Mark Resolved
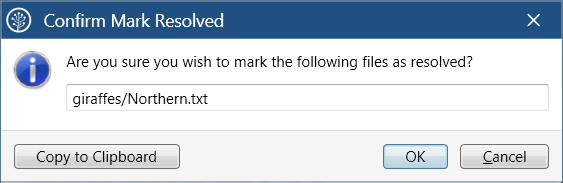
- Accept the Confirm Mark Resolved info panel that pops up:
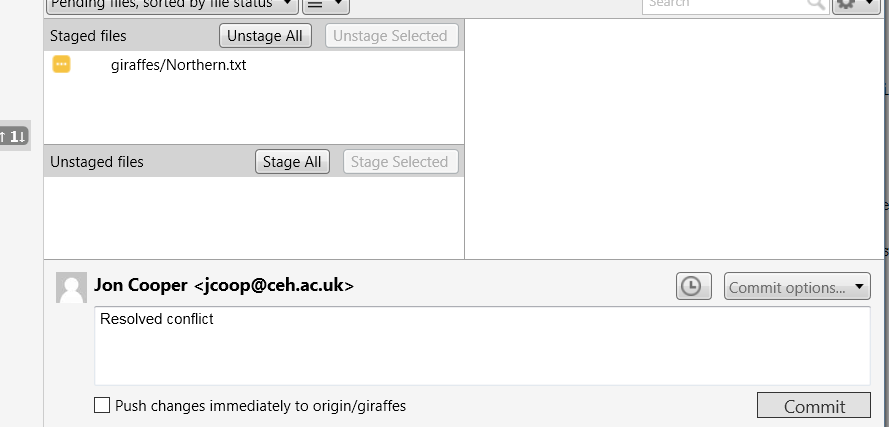
- Commit your resolved changes
- Finally you should have two commits to push, press the Push button to send them up to Github:
- Adding an external conflict resolution tool that SourceTree can hand off to can make that process much easier, but this exercise doesn’t cover that (yet). The process you have just done allows you to manually edit any conflict, so you have enough knowledge to get out of trouble.
Step 8. Pull Request
The team has finished all the work for the giraffes branch. It is time to merge it back into the Master branch. We are going to do this by issuing a Pull Request in Github. A pull request engages others in the team to review the work before the branch is merged into the master branch. It can involve discussion threads and additional changes. When they are happy with our changes the branch is merged into master. It is a quality control step that helps ensure that the target branch (usually the master) only contains approved work.
- Just one team member should create the pull request as follows
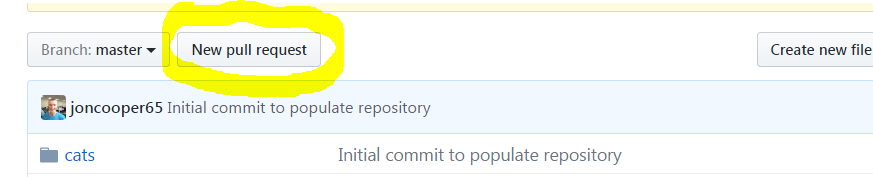
- in Github, on the main page of the team’s repository, under the Code tab press the New pull request button:
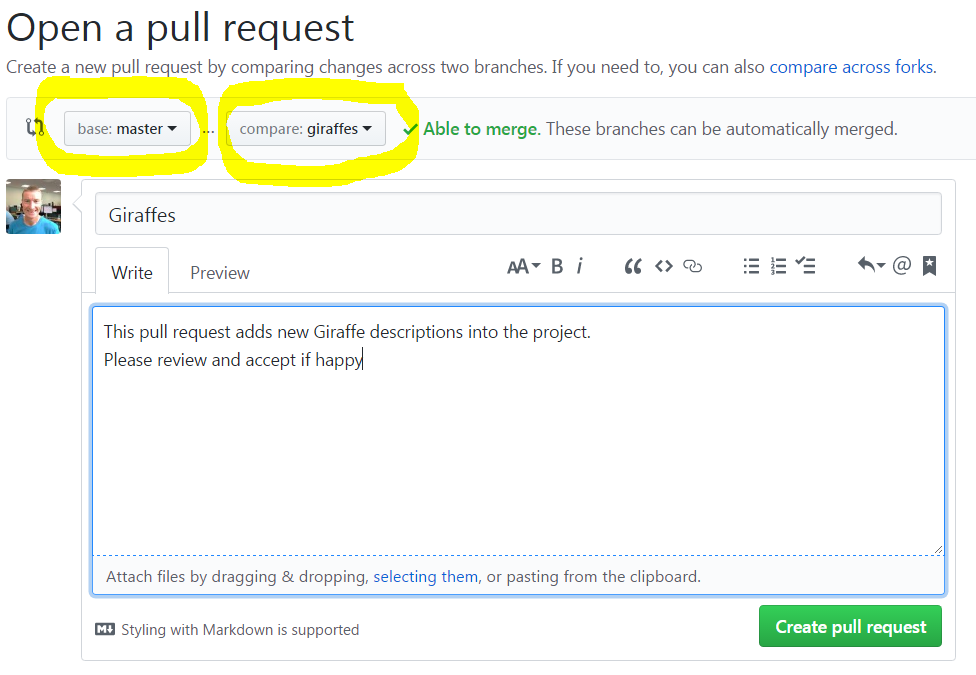
- In the two drop downs that appear, select base: master and compare: giraffes. The target branch for the pull request is the base branch. You should see a green Able to merge message indicating the giraffes branch will merge into master without conflicts. Add a description of what the work was about and press Create pull request
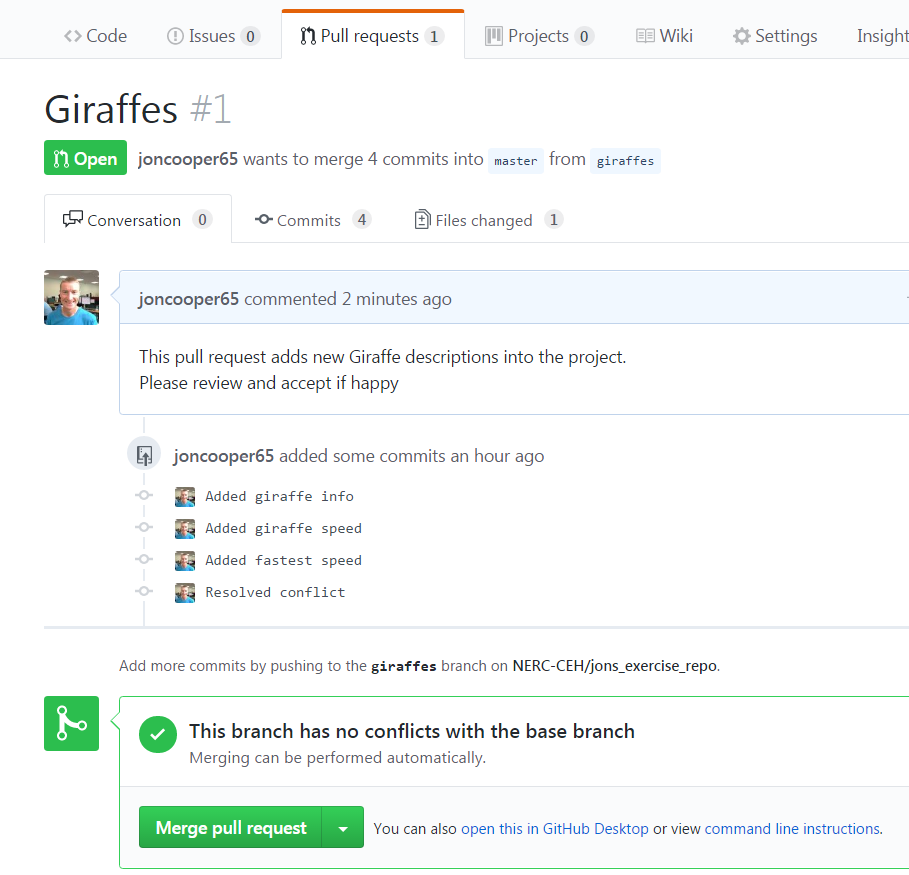
- All collaborators of the repository get an e-mail to let them know a pull request has been submitted. They will also see the merge request pending when they go to the repository’s main page on Github and select the Pull requests tab. One of you should take a look, review the work and when you are happy with it press the Merge pull request, followed by Confirm merge:
- It will report that the pull request has been successfully merged and the creator of the merge request will then be notified by e-mail.
Step 9. Exercises finished, please clean up Github if you’ve finished with them
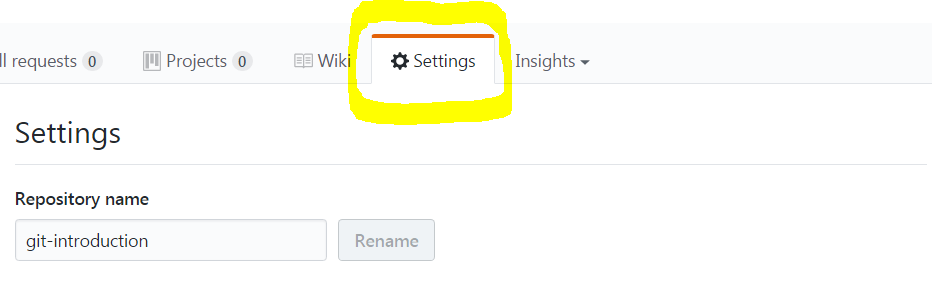
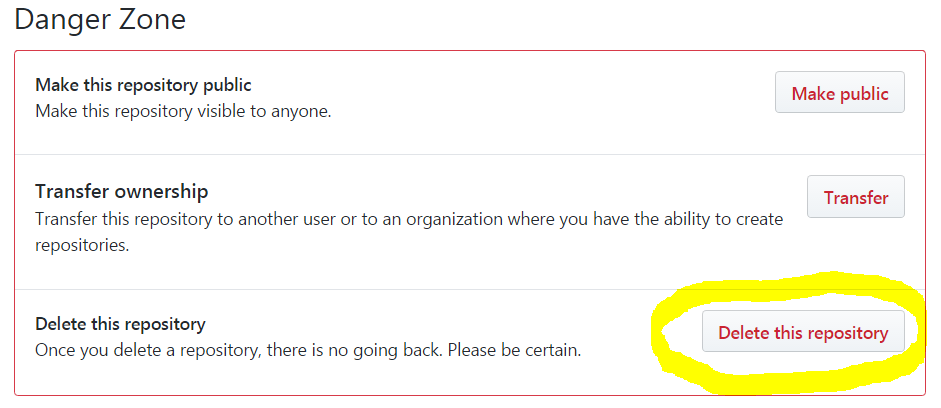
- This concludes the Version Control exercises. Normally you will keep your repository running for the length of your project and even beyond. However, it is quite possible to delete the repositories you own. In a few days after the workshop we will remove the test repositories you created today in the NERC-CEH organisation. This gives you time to review them outside the workshop if you want to. However, feel free to delete your repository now to help us - you’ll find the Delete this repository button in the Danger Zone under the Settings tab of your repository’s main page, like this:
We hope you found these exercises useful and you continue to learn more about version control with Git as you incorporate it into your working processes.