Including your method into the Environmental Data Science Toolbox is a fantastic way of improving the outreach of your work and supporting collaborative science 🌟
The toolbox supports inclusion of a wide range of methods and different coding languages, so whatever your idea we’d love to hear about it and to help promote it!
The contribution process is very straightforward and requires only a few steps - so don’t hold back and start the process as follows:
1. Open a GitHub issue
Create a GitHub issue in the repository and select the ‘Notebook Inclusion Request’ template. Fill in the initial fields. If you’re able to fill in the additional fields section do that as well, although these can also be done subsequently after following the below steps. If struggling with any of the below steps, write a comment about it in your GitHub issue and tag the toolbox reviewers using: @NERC-CEH/toolbox-reviewers.
2. Prepare your notebook
Create a notebook utilising the structure in this template, which when rendered in the toolbox will look like this: template rendered.
Follow the notebook metadata guidance to correctly complete the required frontmatter fields in the first cell of the notebook.
3. Store your notebook in a GitHub repository
Store the notebook file in a separate GitHub repository to the toolbox. This can be an existing repository or you can create a standalone GitHub repository following the naming convention: ds-toolbox-notebook-notebookname. Include any necessary files to run it (e.g. referenced images etc.), as well as a CITATION.cff file.
4. Clone the toolbox repository
Either request collaborator access to the data-science-toolbox repository by emailing jercar@ceh.ac.uk, or create a fork. Then run the following in a terminal on your local machine:
git clone https://github.com/NERC-CEH/data-science-toolbox.git5. Add a link to your notebook
Before making any changes create create a branch on the repository. Naming convention for branches is {yourname}/{branchname} (e.g. jez/bias-correction). Then add the GitHub url of your notebook to notebooks.yml and update the myst.yml table of contents in the repository:
notebooks:
  - name: ds-toolbox-notebook-name
    url: https://github.com/NERC-CEH/ds-toolbox-notebook-name.git
    branch: main
    path: notebook.ipynb
    assets:
      - images/
- file: methods/ds-toolbox-notebook-name/notebook.ipynb
title: Notebook Title6. Render the toolbox with your notebook
To render the toolbox you’ll need to create a python virtual environment. We recommend using uv and simply running the following from the terminal in the root of the cloned toolbox repository:
uv syncThen to pull in your notebook run:
uv run python scripts/sync_notebooks.py --manifest notebooks.yml --executeFinally to render the toolbox with your updated notebook run:
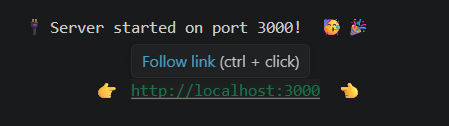
uv run jupyter book startThis will create the build files and will provide a link for viewing.
7. Iteratively improve notebook and submit pull request
Once you can render the notebook in the toolbox you can iteratively improve the notebook and once you’re happy:
Save the updated notebook to the repository you created in step 3.
On your branch of the cloned toolbox repository Git commit the changes to notebooks.yml and myst.yml and git push to your remote branch.
On the GitHub page of the toolbox or your fork, create a pull request to merge your remote branch into main and to ask collaborators for feedback on the changes.