metamet
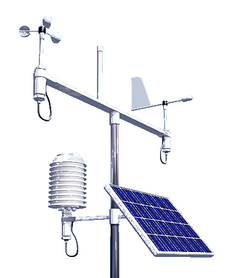
metamet is an R package which attempts to solve many of the problems encountered in working with meteorological observation data. It provides a system for:
- standardising metadata
- converting between file formats
- converting between variable naming conventions
- converting units
- automating QA/QC
- facilitating manual QA/QC via a shiny app
- imputing missing values or “gap-filling”
It does this by defining:
- a standardised generic data structure with enough complexity to hold both the observational data and the metadata, including site-specific, variable-specific and individual record-specific metadata; and
- methods/functions for converting data between formats, combining data from different sources, quality control and gap-filling.
Getting started with the Shiny app
metamet includes an interactive Shiny application for manual QA/QC and gap-filling of meteorological data. The app lets you build a metamet object from raw data files, inspect and correct observations interactively, and export the processed data.
Install app dependencies
The app requires several additional packages that are not installed by default. Include them all at once with pak:
pak::pak("NERC-CEH/metamet", dependencies = TRUE)Or install them individually:
install.packages(c(
  "shiny", "shinydashboard", "shinyjs", "shinyFiles",
  "shinyvalidate", "shinycssloaders", "ggiraph", "glue"
))
Launch the app
metamet::run_shiny()App workflow overview
The app guides you through a four-stage workflow:
Create or open a
metametobject – Use the Create new Metamet object wizard to import a raw data file (CSV, Campbell TOA5, old Campbell.dat/.dld, or CEDA BADC-CSV), map variables to ICOS names, set QC ranges, and optionally attach ERA5 reference data. The wizard saves the result as a.rdsfile. Alternatively, use Open existing Metamet object to load a previously saved.rds.Select date range and QA/QC – Choose a start and end date/time, click Retrieve from database, then inspect each variable in its own interactive plot tab. Select suspect data points with the lasso tool, pick a gap-filling method (time interpolation, regression, ERA5 substitution, or others), add an optional comment explaining the change, and click Impute selection. Click Finished checking variable when a variable is signed off.
Save changes – Click Save changes to write a new
.rdsfile (named with your system username and today’s date) plus a CEDA-formatted output in the same directory as the source file.Download processed data – Export Level 1, Level 2, or CEDA-formatted data as
.csv(or.zipfor Level 1/2) from the Download processed data tab.
For a detailed walkthrough see the App User Guide.
Basic metamet workflow - create a metamet object without the app
Basic usage is to first create metamet objects from files or pre-existing data frames or data tables. Because all the metadata describing the observations is available in the structure, objects can be processed relatively easily so as to:
- rename variables in standard naming conventions
- combine data from different sites
- apply quality control
- impute missing data.
library(metamet)
fname_dt <- testthat::test_path("data-raw/UK-AMO/UK-AMO_BM_dt_2026.csv")
fname_meta <- testthat::test_path("data-raw/dt_meta.xlsx")
fname_site <- testthat::test_path("data-raw/dt_site.csv")

mm <- metamet(
  dt = fname_dt,
  dt_meta = fname_meta,
  dt_site = fname_site,
  site_id = "UK-AMO"
)
#> Loading file: tests/testthat/data-raw/UK-AMO/UK-AMO_BM_dt_2026.csv
#> Error in `read_obs_autodetect()`:
#> ! file.exists(path) is not TRUE

# print the outline strucutre:
mm
#> Error:
#> ! object 'mm' not found
A typical workflow would go on to perform tasks such as adding reference data from ECMWF ERA5 reanalysis, join with other metamet objects, apply quality control algorithms, impute missing values by various algorithms, and check the data manually for additional QC. This is illustrated below.
mm <- add_era5(
  mm,
  fname_era5 = testthat::test_path("data-raw/dt_era5.csv")
)
mm <- join(mm, mm_old)
mm <- apply_qc(mm)
mm <- impute(mm = mm)
run_shiny()
Clearly a two-dimensional data table is not sufficient to hold all the information. Instead we define a metamet data object as a set of related data tables. We implement this as a list in R, containing five data tables (prefix dt_) explained in the table below.
| Name | Type | Contains | Rows correspond to | Columns correspond to |
|---|---|---|---|---|
| dt | data.table | sensor data | time intervals | variables |
| dt_meta | data.table | variable- and time-specific meta data (like netCDF data attributes) e.g. coords for sensor locations | variables x time period | metadata variables |
| dt_site | data.table | site-specific meta data (like netCDF global attributes) | sites | metadata variables |
| dt_qc | data.table | QC codes | time intervals | variables |
| dt_ref | data.table | ref data e.g. era5 | time intervals | variables |